Creatives & Communication: how to deal with overlay objects
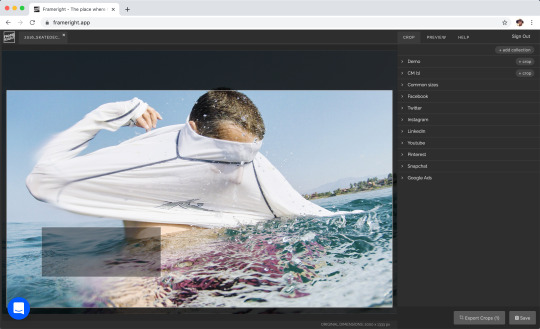
Image cropping is much more than having an object in the frame; it is about dynamics, distractions… and… what will be on top of it.
Often pictures are sandwiched underneath headlines, logos, or some other content. Those convey information and add to the design, which is a good thing. At least until they start hiding crucial parts of the picture. In the print days, this was easy to manage, but nowadays, with so many outlets and sizes needed, it gets a bit more complicated.
Here is an example case I made to showcase the problem.
The reality today in the digital environment is that those overlay elements are randomly positioned over images. There is no real way to make an “overlay aware” crop of an image. This is why we built a new feature into Frameright that gives control over how those objects are positioned on top of the image. It is easier to imagine how things will end up looking like when you have a concrete example on your screen.
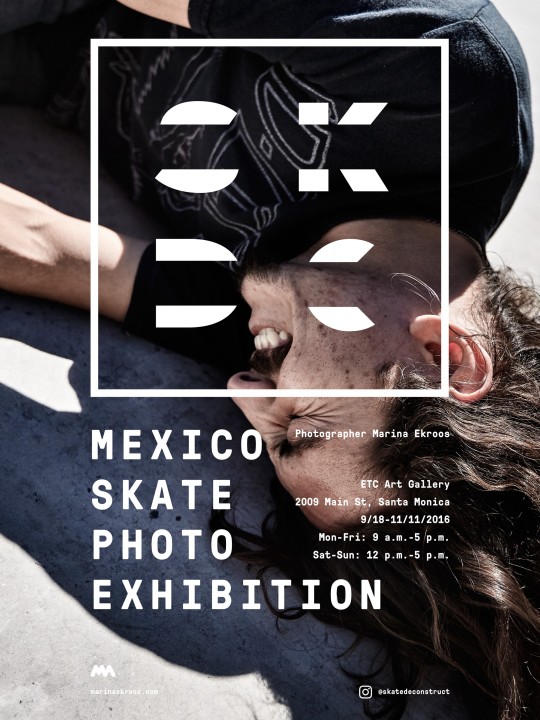
When making this poster, I had a long discussion with our designer Jaakko (we used to work together also before Frameright) about how the picture and graphic elements should interact. It was a print product, so one decision was enough :)
With the “reserved area” feature, creative teams can easily communicate where design elements will be positioned.
It works like this on Frameright: Once you have defined a crop template, the “add reserved area” option appears above the Cancel and Save buttons. Just click it.
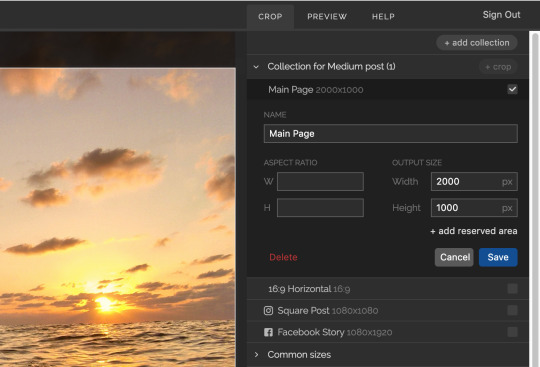
After defining a crop, click on “add reserved area”, located on top of the Cancel and Save buttons.
The reserved area options will open up, and now you can define an overlay area by defining the distance from each side in percents. The area needs to be defined only once per corp. The crop template can then be used until there is a change in the design.
Tip: bring a screenshot of the design and position the reserved are on top of the screenshot
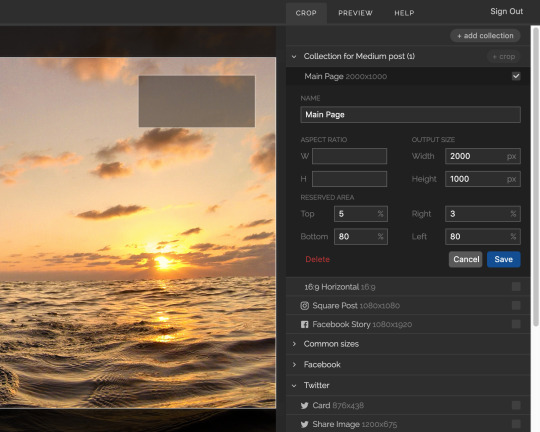
The area is defined as a distance in percents from each side. You need to click save to see the results. The next improvements will make this smoother, but you can start using it already.
This is the first version of the feature. At the moment, it is possible to add a single area. We’d love to hear how it feels and to what direction we should build it to make your life easier.
Good design requires communication. We make it possible with Frameright.
Here is a tutorial explaining how you can define crops with reserved area:
❤ Marina from Frameright